Brake Pad Replacement
See pictures below to learn how easy it is to replace brake pads yourself. Follow these pages if you know what kind of brake repair help you need.
- Disc Brakes
- Brake Rotors
- Brake Caliper
- Vacuum Booster
- Drum Brakes
- Wheel Cylinders
- ABS
- Master Cylinder
Front Brake Pad Replacement Step by Step procedures:
Step 1. You will need to jack up the car and remove the front wheels to gain access to the front brake components.Step 2. Remove the two Brake Caliper bolts from top and bottom.

Step 3. Remove the Caliper. It may be necessary to use a screwdriver to pry the caliper loose allowing it to be removed easily.
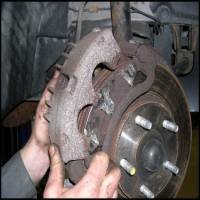
Step 4. Remove the Front Brake Pads. They will slide off from each side.

Step 5. Remove the two caliper mounting bracket bolts. You may need to use an extension to break these bolts free.

Step 6. Remove the Caliper Mounting Bracket .

Step 7. Remove Front Brake Rotor. Should the rotor become stuck, you may need to use a Large Hammer to jar it loose.
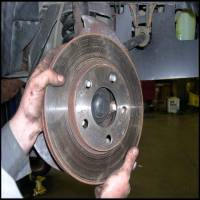
Step 8. Remove the Caliper Slide Pins .

Step 9. Lubricate the slide pins with a non-drying silicon based brake parts lubricant. This will insure the caliper can move freely as needed.
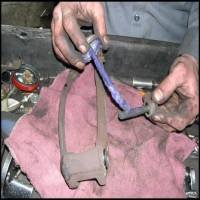
Step 10. Lubricate the caliper mounting bracket brake pads sliding plates. This will allow the brake pads to slide easily and reduce noise.

Step 11. Spray brake wash or brake cleaner on the rotor surface to loosen dirt and oil.

Step 12. Wipe off brake cleaner along with the oily coating that is applied to prevent the rotors from rusting. Failure to do this will cause unwanted noise.
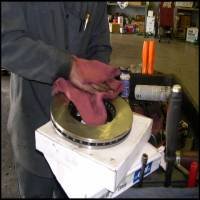
Step 13. Install the New Rotor over the wheel studs.

Step 14. Install caliper mounting bracket using the two bolts you removed in Step 5.

Step 15. You may want to apply a small amount of "blue" LockTite to the bolts before tightening them.

Step 16. Apply a small amount of non-drying brake silicon to the back of the New brake pads. This will help reduce noise that is caused by vibration.

Step 17. Install the brake pads into the sides of the caliper mounting bracket. Be sure to wipe off any lubricant that might have gotten on the rotors.

Step 18. Compress the caliper pistons. Here we use a caliper compressor but a c-clamp or equivalent can also be used. NOTE* Removing the brake fluid reservoir cap before hand allows for easier compressing!
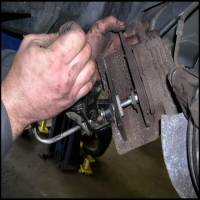
Step 19. Install the Caliper. Slide the caliper over the pads and align the caliper mounting holes and install the two bolts removed in Step 2.

Step 20. Attach the wheels and pump the brake pedal. Check and top off the brake fluid level. Almost done, no job is complete with out a test drive. And what about a break in procedure. I have not read anything about a break in procedure but what I like to do is drive the car about a 1/4 mile with the brake pedal slightly applied and then drive normal. This is good for disc brakes not drum brakes. You shouldn't hear any noises, rubs or squeaks at all. That is how you know changing brake pads has been worth it. And with the brake pad replacement cost increasing these days it doesn't hurt to save some money every chance you get.
For Vehicle Specific Car Brake Auto Repair Manuals, Troubleshooting charts and Technical Service Bulletins. You can gain full on-line access to the same software that the dealers use for just $19.95 that cover repair of your entire vehicle. You can see step by step procedures on replacing brakes, bleeding procedures and more. Check it out.


