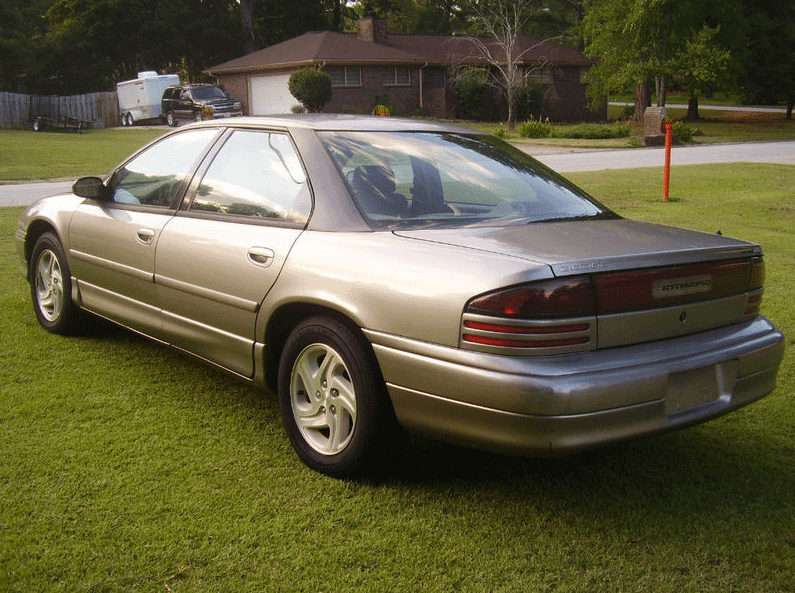
The vehicle was leaking antifreeze from water pump. We replaced the water pump and then the radiator. Attempted to fill with antifreeze and found another leak. Passenger side rear Freeze/ Frost Plug was missing. We replaced it and filled with antifreeze. Started vehicle for about 20 secs and now another leak. This time between flywheel area and engine.
Are their frost plugs on rear of engine?? How can we seperate the engine and tranny to areplace the frost plugs??
This is all being done in driveway. I do not have access to a lift or a cherry picker. Any detailed help would be GREATLY appreciate!! Thanks.
Engine Freeze plugs
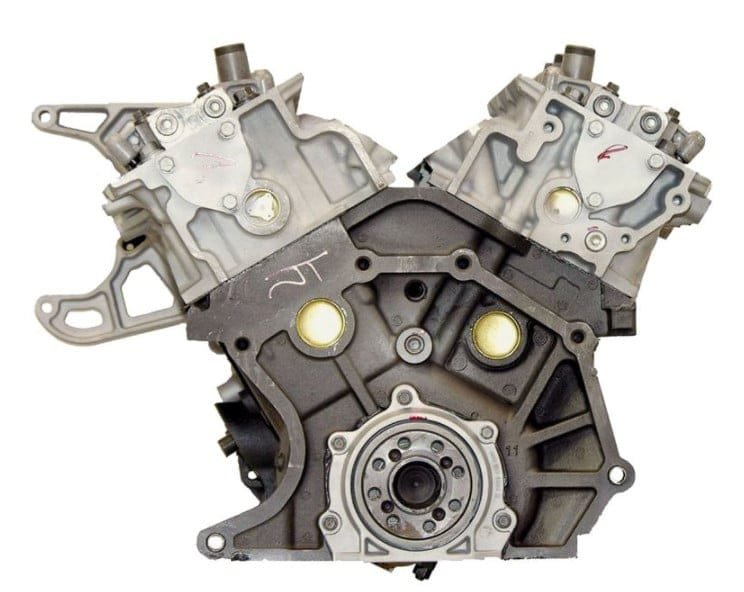
First Question. Does it have freeze plugs in the rear of the engine. Yes, see the image of the rear of the engine showing them in the block and head. Make sure the leak is not leaking down from above before diving in.
I will provide the manual instructions below for separating the engine and transmission. How I have done this in a driveway is to use jack stands and more than one floor jack. Start by placing a block of wood or pipe across the engine compartment so that it rests just inside the fender. Chain the engine to the pipe/wood. This will support the engine as you will be leaving it in the car. Jack the the vehicle and support it by the side of the car, not the frame. Set the floor jacks under the frame on either side. Once the bolts are removed and the engine/trans are separated you lower the jacks and this will give you access to the back of the engine. Then remove the flywheel to gain access to the freeze plugs. If you find you need more check out the Premium Auto Repair Manuals.

Transaxle Removal and Installation
The 42LE 4-Speed Transaxle uses fully-adaptive controls. Adaptive controls are those which perform their functions based on real-time feedback sensor information. The transaxle is conventional in the use of hydraulically applied clutches to shift a planetary gear train. However, it uses electronics to control virtually all other functions. The following components are serviceable in the vehicle: valve body assembly, solenoid pack, manual valve lever position sensor, input and output speed sensors, transfer chain and sprockets, short (right side ) stub shaft seal and the long (left side ) stub shaft and ball bearing. Note that the factory recommends that before attempting any repair on the 42LE 4-speed automatic transaxle, always check for proper shift linkage adjustment. Also check for diagnostic trouble codes with the Chrysler DRB scan tool (or equivalent).
Use Mopar® Type 7176 Automatic Transmission Fluid only. Do NOT substitute transaxle fluid. If the differential sump requires fluid, use 80W-90 petroleum based Hypoid gear lubricant. The transaxle can be removed without removing the engine. Use the following procedure.
Removal
- Disconnect negative battery cable.
- Remove the engine air inlet tube.
- The crankshaft position sensor is located on the upper right side of the transaxle bell housing. Unplug the crankshaft position sensor connector and remove sensor.
- Unplug the transaxle wiring connector block located on the right shock tower. To free the connector from the harness, remove the wire ties.
- Raise and safely support the vehicle.
- Remove the front wheels.
- Remove the strut to steering knuckle bolts on both sides of the vehicle. Disconnect the tie-rod ends if required.
- Remove the Anti-lock Brake System (ABS) wheel speed sensor, if equipped.
- Remove the halfshafts from the transfer case by inserting a prybar between the halfshaft and the transaxle case and pry the shaft from the transaxle housing. Swing the shafts out of the way keeping the joints straight and suspend using wire. Be careful NOT to damage the halfshaft seals.
Do NOT let the halfshafts or CV-joints hang unsupported. Internal joint damage may result if allowed to hang free.
- Remove the engine-to-transaxle brackets and the transaxle bell housing cover.
- Mark the driveplate to the torque converter and remove the torque converter bolts. The driveplate-to-torque converter bolts are NOT to be reused.
- Unbolt and remove the starter assembly from the bell housing and allow the starter motor to sit between the engine and the frame.
- Disconnect the oil cooler lines from the transaxle and plug to prevent excess fluid leakage.
- Remove the transaxle dipstick.
- Disconnect the gear selector cable from the transaxle.
- Disconnect the exhaust pipe from the exhaust manifold and position out of the way. If the clearance will NOT allow for transaxle removal, remove the exhaust system from the vehicle.
- Support the transaxle using a transmission jack. Raise the transaxle slightly to relieve the weight off the rear transaxle mount.
- Remove the engine-to-transaxle brackets and the transaxle mount through-bolt.
- Remove the rear crossmember mounting bolts. Pry the transaxle mount rearward to separate the mount from the transaxle. Remove the rear crossmember.
- Lower the rear of the transaxle to gain access to the bell housing bolts. Remove the bell housing bolts.
- Place a drain pan under the dipstick in the transaxle to catch transaxle fluid that will drain out of the case. Remove the dipstick tube from the transaxle and plug hole.
- Remove the engine-to-transaxle bolts and lower the transaxle from the vehicle.
The driveplate-to-torque converter bolts and the driveplate-to-crankshaft bolts must NOT be reused. Install new bolts when ever these bolts are removed.
- Inspect the driveplate for cracks. If cracks are present, replace the driveplate.
To install:
Apply a light coating of grease to the pilot hole of the crankshaft if the torque converter is being replaced.
| WARNING |
| When installing the transaxle unit into the vehicle, be careful that the fuel tubes at the rear of the engine do NOT contact the following: |
- Tie rod attachment plate at the power steering rack
- Exhaust Gas Recirculation (EGR) tube
- Transaxle wiring harness
- Install the driveplate to the engine and secure using new fasteners. Tighten the fastener to 75 ft. lbs. (101 Nm).
- Install the transaxle into the vehicle and install the engine-to-transaxle case mounting bolts. Tighten the bolts to 75 ft. lbs. (101 Nm).
- Install the rear transaxle case mount and the rear crossmember in position and secure all fasteners.
- Install the dipstick tube.
- Reconnect the exhaust pipe to the engine exhaust manifold.
- Next reconnect the gear selector cable to the transaxle. Reconnect the transaxle oil cooler lines.
- Install the starter assembly and secure with the mounting bolts tightened to 40 ft. lbs. (54 Nm). Be sure that the starter ground strap is installed correctly.
- Position the torque converter so matchmarks made during disassembly are in alignment. Install new torque converter to driveplate bolts and tighten to 60 ft. lbs. (81 Nm).
- Install the transaxle bell housing cover. Install the engine to transaxle brackets.
- While pulling the top of the steering knuckle outward, install the inner CV-joint with new retainer clip in place, into the transaxle.
- Install the ABS wheel sensor, if removed. Install the strut-to-steering knuckle bolts and secure.
- Then Install the front wheels and lug nuts. Tighten the lug nuts, in a star pattern sequence, to 95-100 ft. lbs. (129-135 Nm).
- Lower the vehicle to the ground. Install the transaxle dipstick.
- Engage the transaxle wiring harness connector on the right shock tower.
- Install and reconnect the crankshaft position sensor.
- Install the air inlet tube and reconnect the negative battery cable.
- Start the engine and allow to idle for two minutes. Apply parking brake and move selector through each gear position, ending in N. Recheck fluid level and add if necessary. Make sure the vehicle is level when refilling the transaxle. Use Mopar Type 7176 Automatic Transmission Fluid only. Do NOT substitute transaxle fluid. If the differential sump requires fluid, use 80W-90 petroleum based Hypoid gear lubricant.
- Check the transaxle or proper operation. Adjust the shift linkage, if necessary. Make sure the reverse lamps come on when in reverse.
