Turn signals are not working after I have replaced bulbs, fuses and multifactional switch. What else could it be. It is a 1996 GMC Savanna Van.
My first thoughts would be the flasher or wiring/connections. Next, I’ll provide you with wiring diagrams below for a better understanding of the two different possibilities on your vehicle. It will depend if the van is equipped with composite or without composite headlamps. I looked one up for your 1996 GMC Savana:
SIGNAL FLASHER, REPLACE
RELAY CENTER
- Remove instrument panel driver knee bolster panel.
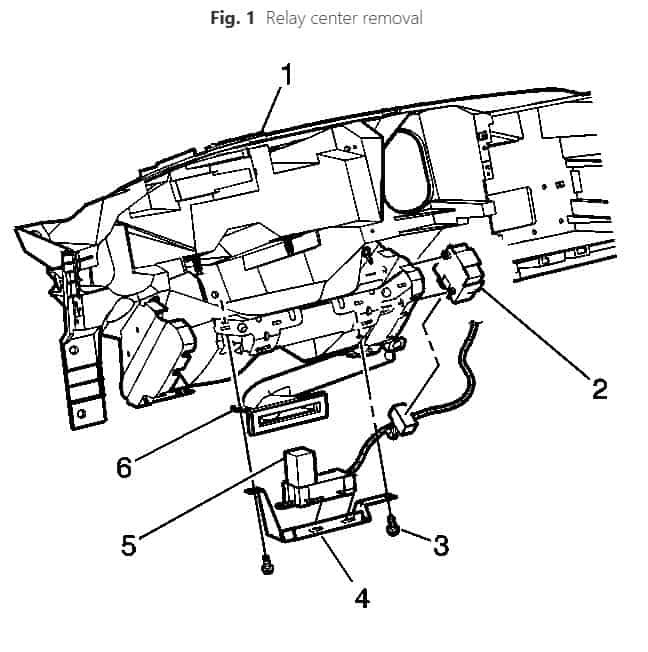
- Remove bolts (3) that retain relay center and bracket to inner and outer brackets of instrument panel driver knee bolster, Fig. 1.
- Remove relay center (5) and bracket (4) from inner and outer brackets of instrument panel driver knee bolster, Fig. 1.
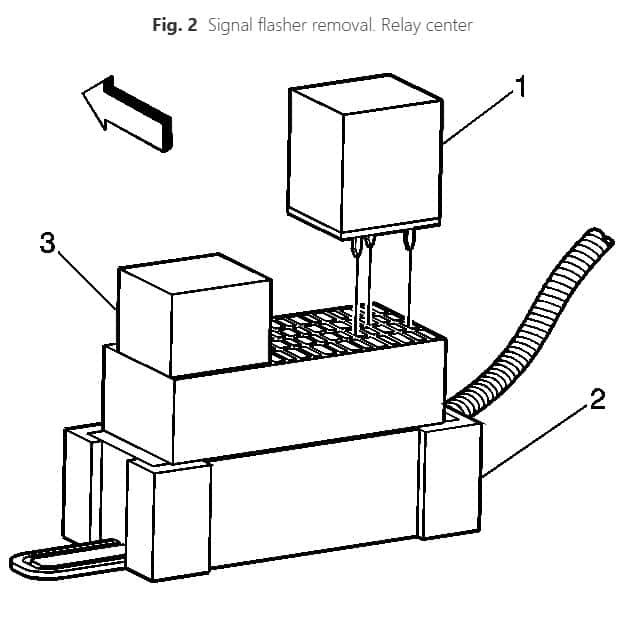
- Disconnect relay (1) from relay center, Fig. 2.
- Reverse procedure to install.
INSTRUMENT PANEL SUPPORT - Remove lefthand knee bolster bracket.
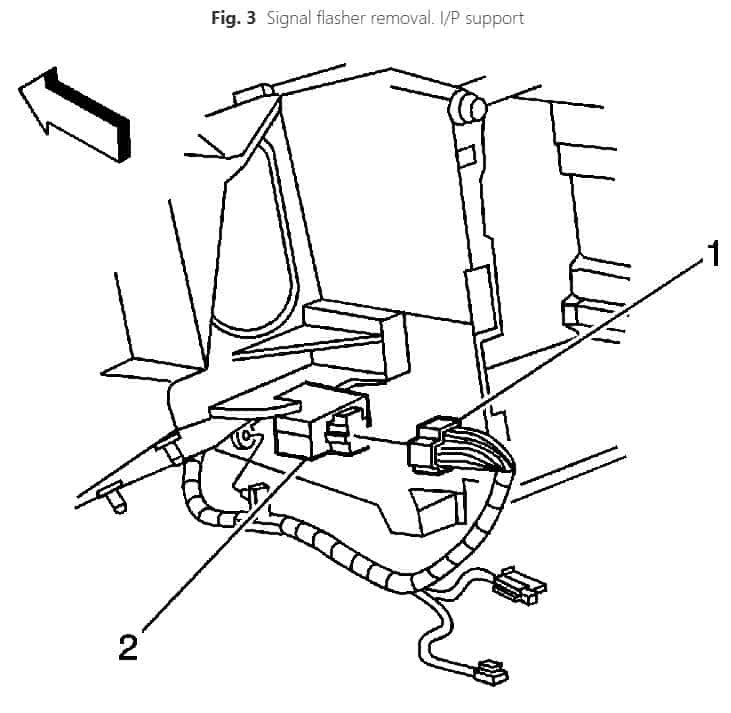
- Remove turn/hazard flasher (2) from instrument panel (I/P) support, Fig. 3.
- Disconnect electrical connector (1), Fig. 3.
- Reverse procedure to install.
Turn Signal
FRONT PARKING & TURN SIGNAL LAMP BULB, REPLACE
BASE
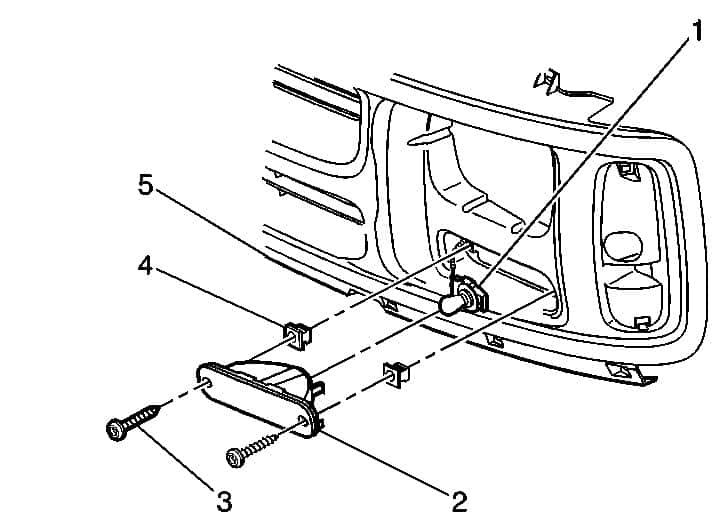
- Remove screws (3) that retain park/turn signal lamp to radiator grille, Fig. 1.
- Remove park/turn signal lamp (2) from radiator grille, Fig. 1.
- Disconnect bulb socket (1) from park/turn signal lamp, Fig. 1.
- Remove bulb from socket.
- Reverse procedure to install.
UP LEVEL - Remove screws that retain park/turn signal lamp to radiator grille.
- Remove park/turn signal lamp (3) from radiator grille, Fig. 2.
- Disconnect bulb socket(s) (1) from park/turn signal lamp by turning bulb sockets in a counterclockwise direction, Fig. 2.
- Remove bulb(s) from socket.
- Reverse procedure to install.

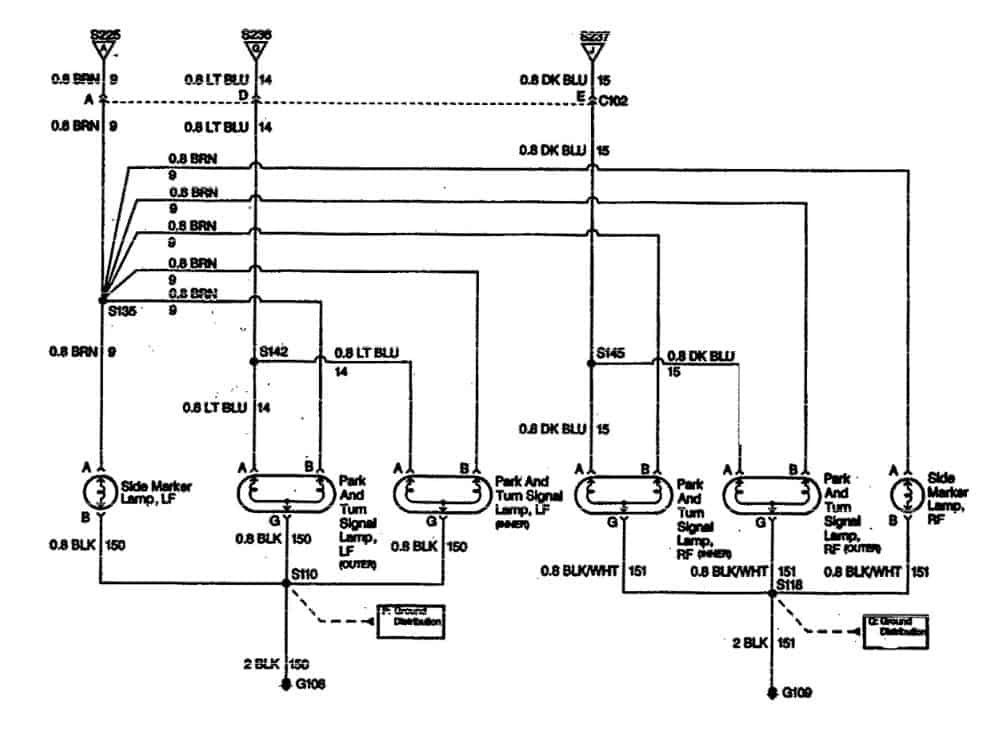
1996 GMC Savana Turn Signal Wiring Diagram with Composite Headlamps
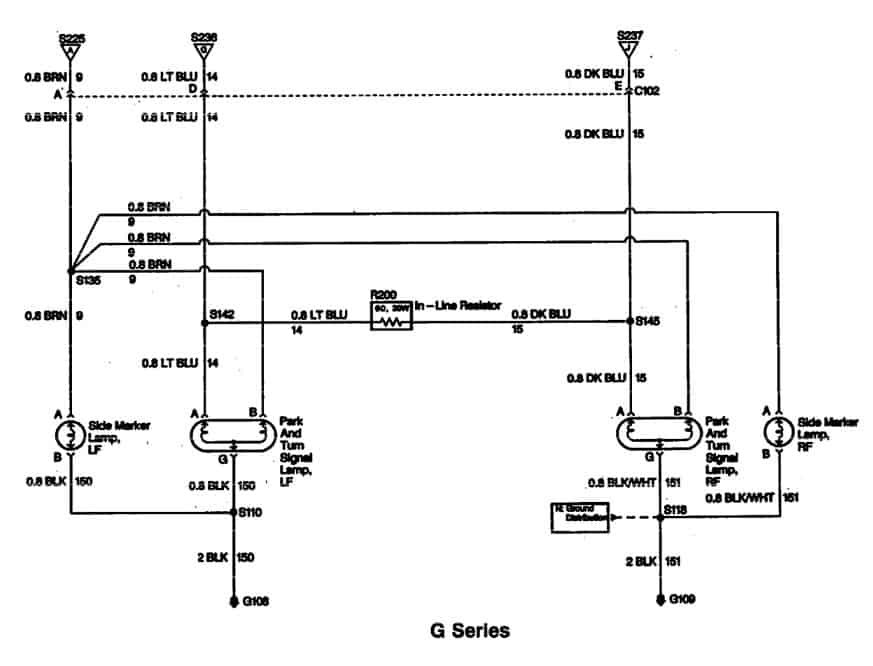
1996 GMC Savana Turn Signal Wiring Diagram without Composite Headlamps
Headlights not working
- Wrong bulbs with halogen capsule headlamps – High Beams take a 9005 Halogen – Low Beams take a 9006 Halogen
- Blown bulb
- Light Socket Replacement headlight pigtail wiring harness socket
- Wiring harness
- Bad or loose ground connection – supply voltage to test bulb and wiring using a Power Probe that has a built in circuit breaker to prevent blowing fuses while testing. Yes I have and use one!
HEADLAMP BULB, REPLACE
Warning: The halogen bulb contains gas under pressure. The bulb may shatter if the glass envelope is scratched or if the bulb is dropped. Handle the bulb only by its base. Avoid touching the glass envelope.
- Disconnect headlamp bulb electrical connector.
- On models equipped with headlamp retaining collar, proceed as follows:
a. Remove headlamp bulb retaining collar by twisting in a counterclockwise direction.
b. Pull headlamp bulb from headlamp housing assembly. - On models without headlamp retaining collar, twist bulb in a counterclockwise direction and remove.
- On all models, reverse procedure to install.
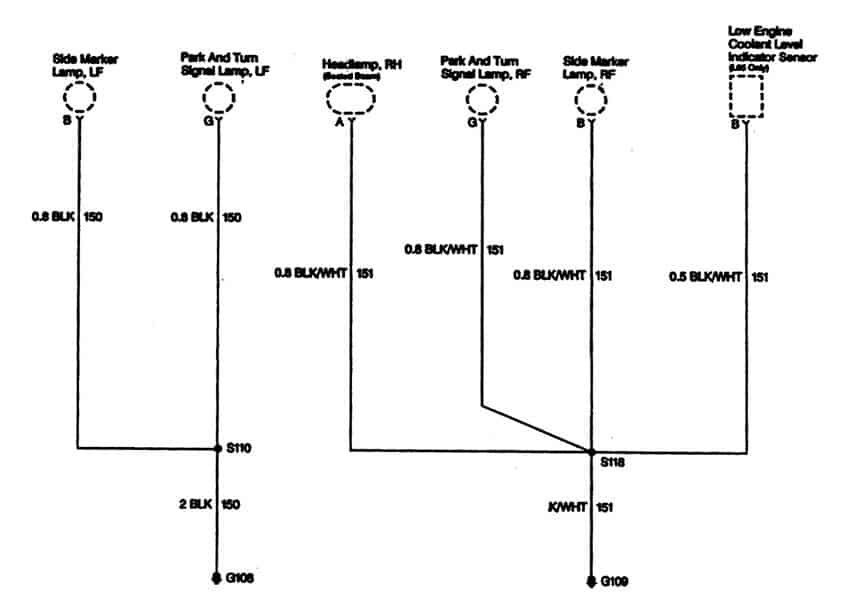
1996 GMC Savana Headlight Ground Distribution
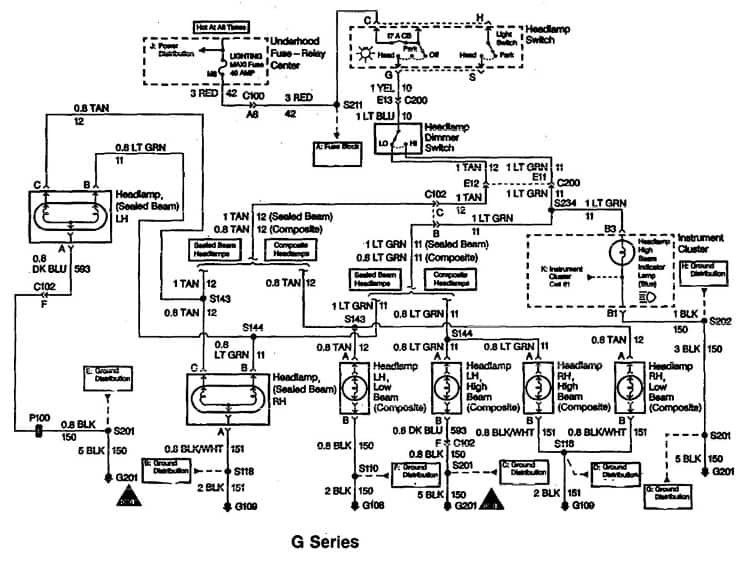
1996 GMC Savana Headlight Wiring Diagram

All of this has been done.
Wow, you replaced the flasher, and tested all your electrical wiring harness wires and connections and grounds. That is all there is left. You should be able to see where you are loosing positive or negative voltage then. And if you are, to or from each component. That would let you know if the “NEW” component is bad.
Comments are closed.