Do you have to change all ball joints at same time? we have already replaced the drivers side rear upper. And does the front have upper and lower or just upper?
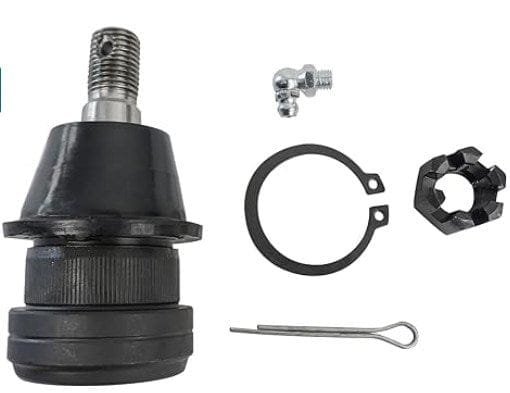
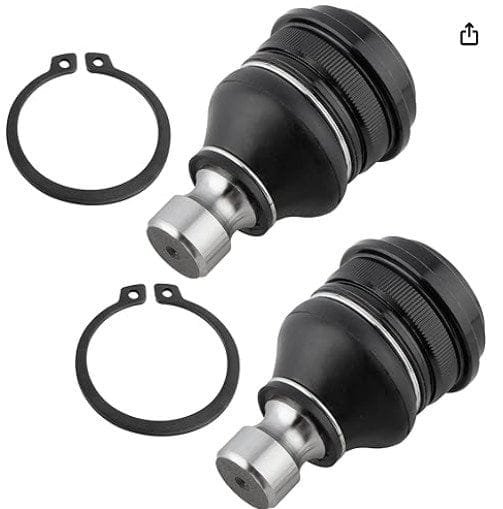
On your 2004 Sebring both the upper and lower front ball joints are serviceable. No, there is no requirement for replacing ball joints all at the same time. Though it may be beneficial to your wallet doing them both at the same time should there be plans to replace them down the road anyway. The parts pictured below are for a 2004 Chrysler Sebring Coupe.
Front Upper Ball Joint 2004 Chrysler Sebring

Front Upper Ball Joint Replacement
CAUTION
If the vehicle is equipped with air suspension, the electrical power to the air suspension system must be shut off prior to hoisting, jacking or towing an air suspension vehicle. This can be accomplished by turning off the air suspension switch located in the luggage compartment. Failure to do so can result in unexpected inflation or deflation of the air springs, which can result in shifting of the vehicle during these operations. Failure to follow these instructions may result in personal injury.
NOTE
On 2005 models, the ball joint is not serviced separately. If the ball joint is faulty the upper control arm and ball joint are replaced as an assembly.
- If equipped with air suspension, the air suspension switch to the OFF position before raising the vehicle.
- Place supports under both sides of the frame just behind the lower control arms.
- Remove the wheel.
- Place a floor jack under the lower control arm at the lower ball joint area. The floor jack will support the spring load on the lower control arm.
- Remove the retaining nut and pinch bolt from the upper ball joint stud.
- Mark the position of the alignment cams. When replacing the upper ball joint this will approximate the current alignment.
- Remove or disconnect the following:
- 2 nuts retaining the upper ball joint to the upper control arm
- Upper ball joint from the upper control arm and spread the slot in the wheel spindle with a pry bar to remove the ball joint stud from the wheel spindle.
To install:
- Install or connect the following:
- Upper ball joint to the upper control arm
- Ball stud into the wheel spindle
- Upper ball joint pinch bolt and retaining nut. Tighten to 56–77 ft. lbs. (76–104 Nm).
- Alignment cams to the approximate position at removal. If not marked, install in the neutral positions.
- 2 nuts retaining the upper ball joint to the upper control arm. Hold the cams and tighten the nuts to 107–129 ft. lbs. (145–175 Nm).
- Wheel and tire assembly. Tighten the lug nuts in a star pattern to 85–105 ft. lbs. (115–142 Nm).
- Remove the floor jack from under the lower control arm.
- If equipped with air suspension, turn the air suspension switch to the ON position.
- Check and adjust the front wheel alignment.
Front Lower Ball Joint 2004 Chrysler Sebring

Front Lower Ball Joint Replacement
- Raise and support vehicle, then remove front tire and wheel assembly.
- Remove lower ball joint heat shield.
- Remove disc brake caliper and support aside, then brake disc.
- Disconnect ball joint from steering knuckle, then turn steering knuckle so front of knuckle is facing as far outboard as possible.
- Separate steering knuckle from lower ball joint by lightly tapping with suitable rubber mallet.
- Remove shock absorber clevis from lower control.
- Remove nut attaching stabilizer bar link assembly to lower control arm using an Allen wrench to prevent stabilizer bar link from rotating.
- Remove stabilizer bar bushing to front suspension crossmember and body mounting bolts.
- Lower one side of stabilizer bar away from lower control arm.
- Remove nut and bolt attaching rear isolator bushing of lower control arm, then nut and bolt attaching front isolator bushing of lower control arm, Fig. 1.
- Remove front isolator bushing of lower control arm to front suspension crossmember.
- Remove front of lower control arm from front suspension crossmember.
- Remove rear of lower control arm from between top and bottom half of front suspension crossmember, keeping lower control arm as level as possible.
- Reverse procedure to install, noting the following:
a. Torque wheel lug nuts to 100 ft. lbs.
b. Torque brake caliper bolt to 16 ft. lbs.
c. Torque ball joint stud to shock tower to 23 ft. lbs.
d. Torque ball joint stud to steering gear bolts to 70 ft. lbs.
e. Torque shock assembly clevis bracket to 68 ft. lbs.
f. Torque front crossmember bolts to 120 ft. lbs.
g. Torque stabilizer bar bushing bolts to 45 ft. lbs.

